Image processing procedure: Stars treatment
This page describes the procedure for the stars processing step.
(The procedure does not describe the technical points implemented in Photoshop to achieve the steps of the treatment: a future tutorial will be made to detail them)
RGB layer alignement and correction of tracking error
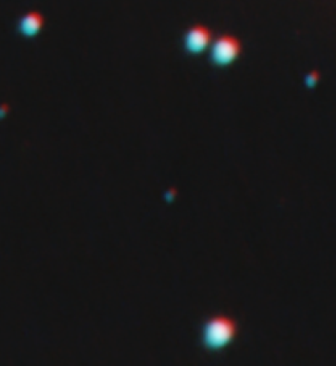
The first treatment is to readjust the RGB layers. Indeed, when we zoom with a 400% factor, we notice that the edge of the stars is red in one direction and blue in the other.
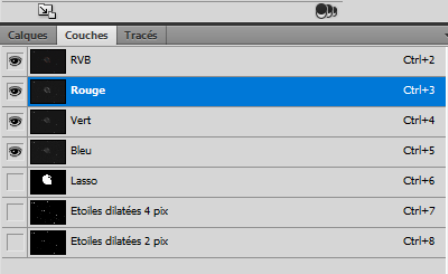
1 / The offset of the RGB layers can only be done on the "Background" layer: switch to 400% zoom mode and select the "Layers" tab then switch into the "move" mode
2 / Select in turn the layer to be moved (appears in blue) with all the layers checked: preferably use the keyboard control arrow for a better alignment of the layer with the star
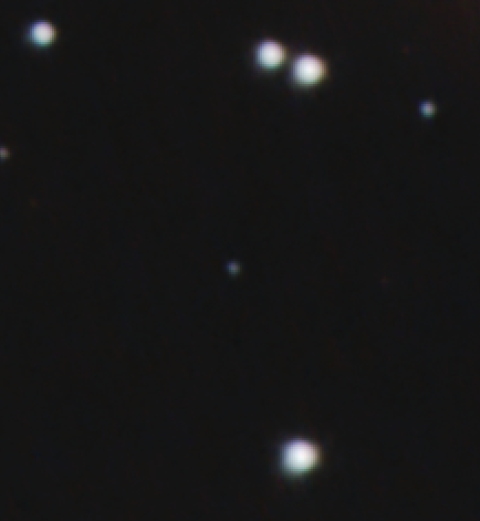
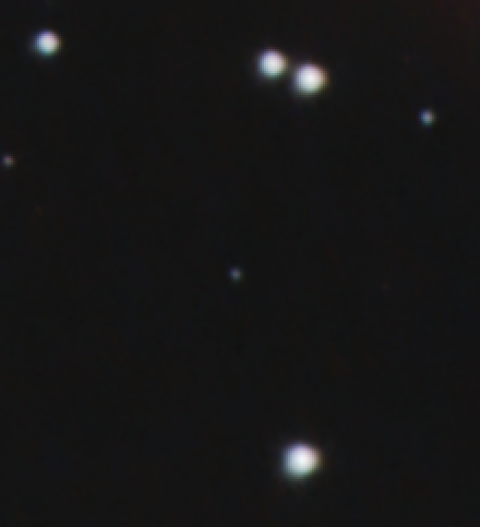
Difference before and after RGB layer alignement


With a large zoom greater than 200%, and in the case of a non-optimal tracking, we see that the stars are slightly elongated. This distortion can be corrected using a stars layer.

Stars layer
1 / Creation of the only stars layer by selecting them using "Select stars" tool of "Focal Pointe Observatory" (See links page): 4-pixels expansion with 2 pixels progressive contour.
2 / Put the stars layer above the RGB layer alignement in clipping mode and switch the layer to "Darken" mode (default opacity to 100%): stars become rounder.
Difference before and after tracking correction
Increase of the local contrast
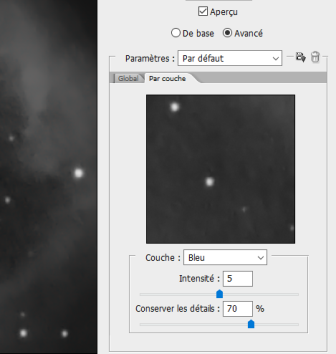
3 / In order to increase the local contrast of the object locally in midtones, I use the script "Local Contrast Enhancement" of the toolbox "Astronomy Tools" (Cf page links) which gives good results without increasing too much the noise.
4 / As we want the previous treatment step applies only to the object, I add a fusion mask on the most luminous parts (other else the noise of the sky would increase a little)
5 / Create a cumulative layer of the previous settings and then apply a fusion mask added on the object (without the stars): use the tool "Noise reduction" by layer with moderate settings in order not to remove too many details.
Difference before and after local increase of contrast

Before the local increase in contrast

After the local increase in contrast
Shrinking, increasing color and adding egrets
Depending on the exposure time and the quality of the tracking, the stars often appear too big. We will apply a "cosmetic" treatment by narrowing them.
To do this, we launch the script "Make Stars Smaller" of the toolbox "Astronomy Tools"
Difference before and after the narrowing of stars
The last treatment of the stars consists in increasing the saturation of the colors a little to better show the young stars in blue and the older stars in orange.
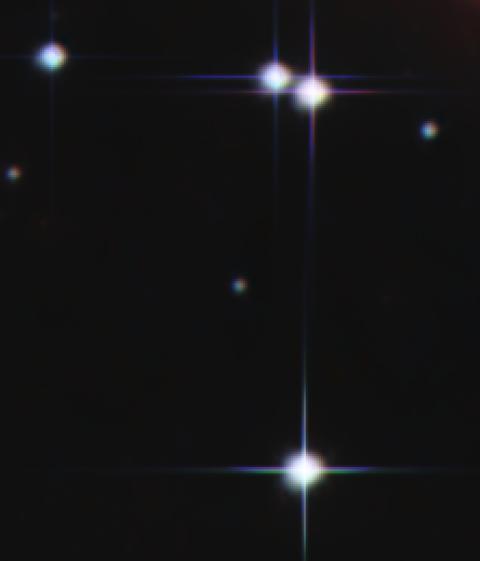
To finish this stage of stars treatment, and for a concern of aesthetics, egrets are added to the brightest stars.
1 / Increase saturation: Launch the "Increase Star Color" script of the toolbox "Astronomy Tools"
2 / Adding egrets: Launch of the script "Star Diffraction Spikes Medium Stars" from the toolbox "Astronomy Tools" (Depending on the size of the stars, you have to try different scripts of the same family in order to get the right level of egrets. Be carreful in the case of an acquisition with a Newton-type telescope that often generates apparent egrets and not always perpandicular depending on the placement of the camera in the eyepiece)
Difference before and after the increase of the saturation and the addition of egrets
Results
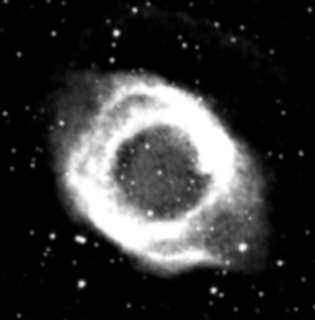
Difference between the output of the "LRGB" processing and the output of the stars processing
Output processing LRGB

Stars processing output
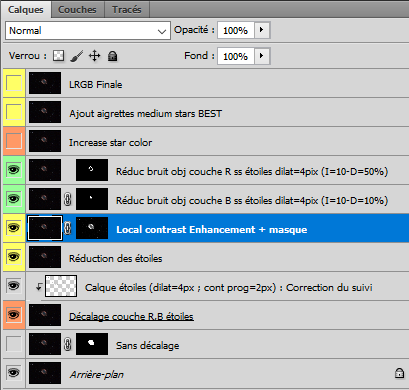
As an example, here under is the stack of layers that were used for star processing step