
Image processing procedure: the stretching
This page describes the stretching step of image processing in Photoshop.
(The procedure does not describe the technical points implemented in Photoshop to achieve the steps of the treatment: a future tutorial will be made to detail them)
Prerequisite
Prerequisite
Before starting processing, you need to have the final image preprocessed in the PSD Photoshop format (see "Image preprocessing procedure" page)
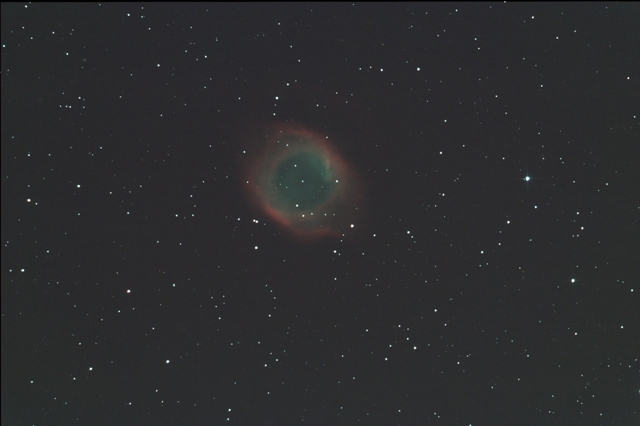
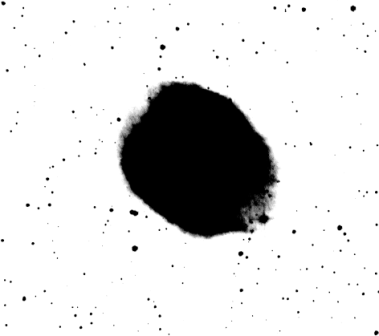
For the image processing procedure, we use the preprocessed image of the Helix nebula in PSD format generated by IRIS from 27 acquisitions at 800 iso / 240 s or a total exposure time of 1h48mn (acquisitions of the 2015/09/21)
The pretreated image shows a kind of haze over the object that is related to the light pollution of the acquisition site that will be the hardest to remove without increasing the noise in the image.
The image in PSD format can be downloaded here: NGC7293_couleur.psd
Stretching
The step of "stretching" allows to stretch the histogram in order to increase the dynamic of the dark tones in the image and thus to make the object brighter.
We begin by performing a calibration of black and white point:

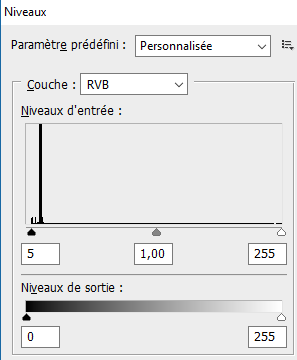
1 / The "Threshold" tool allow to find in the image the whitest and the blackest point.
2 / We can then create a sampling point for the white point and another one for the black point (in our example, the black has the value of "8" and the white has the value of "120")
For the white point, we do not calibrate to the max value of 255 in order not to saturate too much during subsequent treatments: we choose the value of 245.
For the black point, do not calibrate to the minimum found value but rather increase it a little to lighten the dark tones and begin to expand the histogram: we double the value by bringing it to "15" (some prefer calibrate higher to the values of 25 or 30)

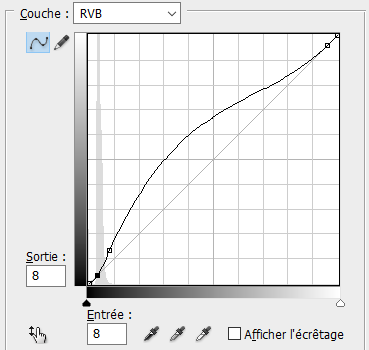
To perform the calibration with the new values of white and black, use the tool "Curves":
1 / Set the black and white pipettes of the tool respectively with the values of "15" and "245" for each color RGB (Note: if the brightest star is not totally white but a little bluish or orange, the white balance will be a little modified but it will be ajusted when removing the gradient that also corrects the white balance)
2 / Calibrate the black sampling point first by zooming in enough : "SHIFT LOCK" key activated and left click on.
3 / Calibrate the white sampling point in the same way as for the black point.
4 / Calibrate the black sampling point again because the calibration of the white point has slightly modified its value.
The values of the black and white points sampled are now well calibrated (in our example, black has the value of "14" and white has the value of "244") and the histogram is slightly larger.
Stretching is done using the 2 "Curves" and "Levels" tools:

1 / Start with the "Curves" tool by choosing a rather aggressive curve like in the example opposite.
2 / Finish with the "Levels" tool by moving the black cursor towards the histogram and leaving a margin of about 5 ticks (if the histogram is far from the cursor, do not move it by more than 15 to 20 graduations, but prefer to make several passes later)
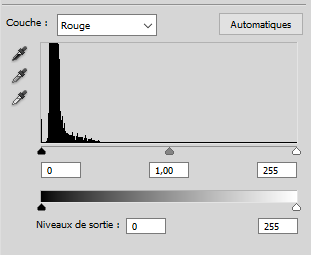
3 / Watch the noise in the sky background: it must remain under control. If this is the case, we can perform a new iteration "Curves + Levels". If the histogram of the Levels tool begins to be a bit extended, it is better to play on each sliders corresponding to layer R, G, B. This allows you to align all the layers together.
In my example, a third iteration grow up the noise that appears in the sky background: I reject it and I only retains 2 "aggressive" iterations.

We must now block the sky background in order not to amplify the noise by placing a lock on the black and also ont the white to avoid the stars to saturate too much.
We proceed in the same way as the previous step but with a blocked curve in the very dark values and also in the very light values and by systematically adjusting the cursor of the histogram by layer RGB.
In my example, a third iteration makes too much noise in the sky background: I reject it and I keep only 2 iterations.

We end the stretching by making a medium curve: we adjust the output level of the single point on the curve that is not on the straight line so as to extend a little more the histogram without making too much noise in the sky background (in my example, the output setting has the value of 28 or 7 pts above the input)
We proceed in the same way as the previous step by systematically adjusting the cursor of the histogram by RGB layer.
In my example, I do not touch the cursor of the Red layer because it is close enough to the histogram (the following treatments could shift the histogram to the left and there will be a risk of losing information)
If the object is not contrasted enough (in the case of galaxies, for example), we can add a so-called 'S' curve and adjust each curve of the 'S' in order to darken the dark tones and lighten the clear tones of the image a little.

Here is the result of stretching for my example. Note that the histogram has expanded relative according to the preprocessing image. It could have been more but the noise would have been too much important and it would have given a synthetic luminance too noisy as we will see later.
On the other hand, before proceeding to the "LRGB" treatment, we can improve certain defects present in this image.
Noise reduction
If we take a closer look (zoom increased) we see that the sky background and the object contain a significant noise.

1 / We start by creating a mask on the stars by selecting them using the "Select stars" tool of "Focal Pointe Observatory" (See links page): dilation to 4 pixels with progressive outline at 2 pixels
2 / Then we create 2 fusion masks with moderate Gaussian blur: one only on the sky background and another on the object itself but without the stars (use of the stars mask)
3 / The "Noise Reduction" tool is applied to the sky background only with the following setting for this example : Intensity = 10; details = 40%; color noise reduction = 0%; highlighting details = 0%
4 / The "Noise Reduction" tool is also applied for the object itself (without the stars) with a less aggressive setting in order to keep the details for this example: Intensity = 5; details = 70%; color noise reduction = 0%; highlighting details = 0%
Difference before and after application of the "Noise reduction" tool
It can be seen that the noise of the sky background has disappeared while the one present for the object is more moderate in order to preserve the details

Before noise reduction

After noise reduction
Gradient removal
The gradient correspond concretely into inhomogeneous tones mainly in the sky background that are mainly due to the light pollution of the acquisition site but also to the quality of the pretreatment (flats)
I use a very good tool (photoshop plugin) to remove the gradient while correcting the white balance: "GradientXTerminator" from Russell Croman (Cf. page links)

Before gradient removal

After gradient removal
Results
Difference between preprocessing output and the "stretching" stage output

Pretreatment output

Stretching output"
As an example, here under is the stack of layers that were used for the stretching step :

