
Image preprocessing procedure with IRIS
This page describes the procedure for the image preprocessing with IRIS
Prerequisite
Before starting preprocessing, you need to have calibration images called "Offsets", "Flats" and "Darks"

To make images with only the darkness current of CCD sensor called "offset", you have to set the minimum exposure time of the device (1/4000s in my case) with the same ISO parameter as the acquisitions (the device must be placed in total darkness)
The number of offset to make must be large (approximately 50 to 100) in order to achieve a master offset that is representative of the statistical serie (median)
Offset images do not need to be made for each acquisition session. So we can build a library of offsets with different ISO settings.
With the aging of the sensor, it will be necessary to think about remaking the library 1/year approximately according to the frequency of use of the device.
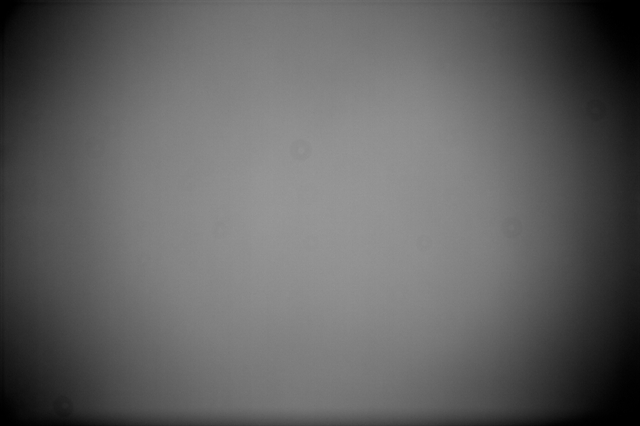
To make so-called "flat field" images, you must first have achieved the focusing (camera mounted on the imager) and then set the same ISO parameter as the acquisition images.
Just place a uniform light source in front of the imager and set the pause time to have a histogram filled about 2/3 (personally, I use a flat screen, some use a homemade flat box)
The "flat" images can be made just after the focusing or after the acquisitions. If the acquisitions are made over a long period of time, dust may be added during the session and it is therefore preferable to redo them periodically.
The "flat" images have to be made at least once for each session. Their number must be sufficient to have a correct median of statistical serie (about 20 to 50)
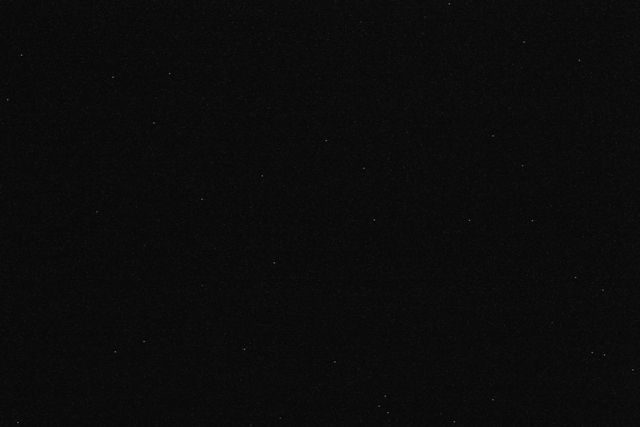
To make images corresponding to the thermal noise called "dark", it is necessary that the device is placed in the total darkness (the protective cover of the imager is not sufficient because it lets a little light pass)
We must create as many series of "dark" images as we made acquisitions with different exposure time. The ISO parameter must be the same as the acquisition images. (Example: 10 to 20 images at 360s / 800iso for acquisitions made at 360s and 800iso)
Ideally, it is necessary to realize the "darks" just after the end of acquisitions on an object because if they are created at the end of session, the ambient temperature may have evolved and the sensor will not therefore be at the same temperature.
The "dark" images can be stored in a library where they will be sorted by temperature and ISO. However, be carreful because new hot pixels can appear at any time between 2 sessions and they will not be subtracted.
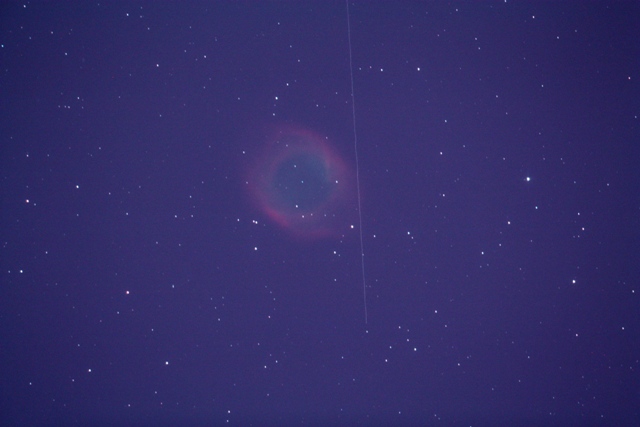
Before starting the images preprocessing, it is necessary to remove from the whole images the defects ones : problem of guidance, plane or satellite crossing the field, UFO, ...
An analysis of the autoguiding records made during the acquisitions can be done in order to have a good idea of the quality of the guidance (tool PECPrep from the EQMOD project - Cf. page "Links")
In order to automate the sorting of images according to the exposure times and the ISO setting, I use the Exif Tool from a Linux VM (Link to the site in the "Links" page): ExifTool_Linux.zip
The sorting by temperature makes it possible to recover the darks with the temperature closest to those of the acquisitions according to the exposure times and ISO.
It should be understood that the more acquisitions we have to add for the pretreatment and the higher signal / noise ratio will be great (better quality of the useful signal in the image) According to my pretreatment tests in a light polluted sky , I realized that I needed at least a dozen acquisitions to start having a useful signal not too noisy in subsequent treatments. However, 20 to 30 acquisitions is the target to achieve if we want to manage noise during processing (As the signal / noise ratio is not linear with the addition of acquisitions, the more we want to increase this ratio and much more it will require acquisitions!)
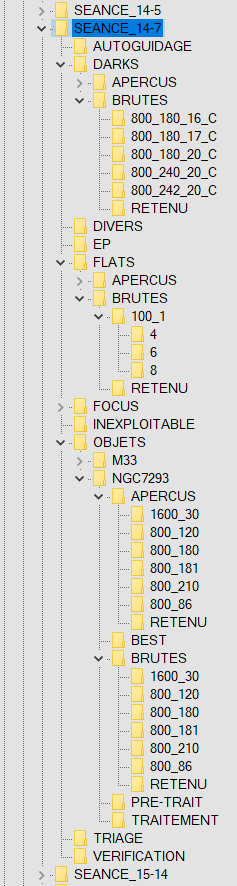
Personally, I realized a script under Linux which makes it possible to create a tree by session that sorts the images automatically according to whether they are in RAW or JPEG format, then by ISO, exposure time and temperature.
In a second step, once the images that have defects have been removed, this script moves the images in a directory "RETENU" which will be used for the preprocessing step.
Each "object" directory of the raw images contains a temperature file that allow the correspondance with the darks. Here is an example of this file which contains in that order the ISO setting, the exposure time, the name of the raw file and the shooting temperature (in Celcius):
1600_30 IMG_0017.CR2 22
800_120 IMG_0020.CR2 22
800_180 IMG_0032.CR2 21
800_180 IMG_0033.CR2 21
800_180 IMG_0034.CR2 21
800_180 IMG_0035.CR2 21
800_180 IMG_0036.CR2 21
800_180 IMG_0037.CR2 21
800_180 IMG_0038.CR2 21
800_180 IMG_0039.CR2 21
800_180 IMG_0040.CR2 21
800_180 IMG_0041.CR2 21
800_180 IMG_0042.CR2 21
800_180 IMG_0043.CR2 21
800_180 IMG_0044.CR2 21
800_180 IMG_0045.CR2 21
800_180 IMG_0046.CR2 21
800_180 IMG_0047.CR2 21
800_180 IMG_0048.CR2 21
800_180 IMG_0049.CR2 21
800_180 IMG_0050.CR2 21
800_180 IMG_0051.CR2 21
800_180 IMG_0052.CR2 21
800_180 IMG_0018.CR2 22
800_180 IMG_0021.CR2 22
800_180 IMG_0022.CR2 22
800_180 IMG_0025.CR2 22
800_180 IMG_0026.CR2 22
Prétraitement
The image preprocessing that I use is done by the software "IRIS" by Christian Buil in its latest version V5.59 (The link is communicated in the page "Links")
In order to make the process automatable, Christian Buil had the good idea to add the script functionnality for most commands. In order not to start from scratch, I reused and adapted to my needs the script of "Tiflo-Astro" whose link is communicated in the page "Links".
Image preprocessing consists of removing for each acquired image the dark current (offset) and the thermal noise without the offset (dark) and to divide the whole by the "flat field" without the offset.
Formula: preprocessed_image = ( (raw_image - master_offset) - master_dark ) / master_flat
With: master_offset = median of all offsets; master_dark = median of all (darks - master_offset); master_flat = median of all (flat - master_offset)
The different steps of preprocessing are the following in that order:
1 / Convert Raw Images (RAW) into IRIS "PIC" Format
2 / Generation of the offset master = median (offsets)
3 / Generation of the dark master = median (darks)
4 / Generation of master_flat_without_offset = median (flats - offset_master)
5 / Application of the preprocessing for each image acquired: preprocessed_image = (raw_image - master_dark) / (master_flat_without_offset)
6 / Color conversion of preprocessed images
7 / Alignment of all preprocessed images in color (geometric transformation)
8 / Normalization of the median level for each aligned image with addition of a constant value (constant set to 1000 in the script)
9 / Addition (or registration) of aligned images by the "Sigma clipping" method
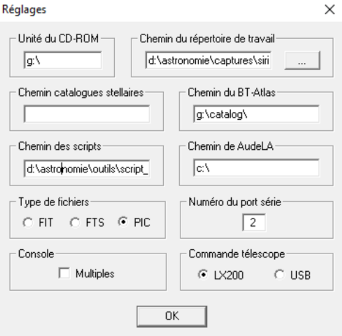
The configuration of the IRIS software has to be done on 2 levels:
1 / It is necessary to initialize via the "Settings" menu the working directory and the directory where the IRIS scripts are located, then to choose the "PIC" file format which is the default native format of IRIS.
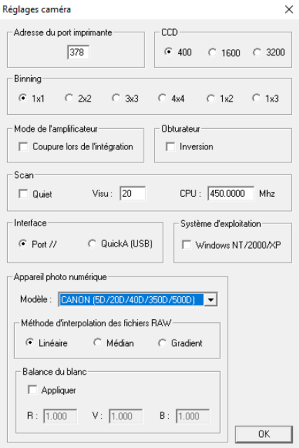
2 / You have also to configure the type of sensor used for the acquisitions via the "Camera Setup" menu and choose the "Linear" mode. (Leave the binnig at "x1" by default and do not apply the white balance correction)
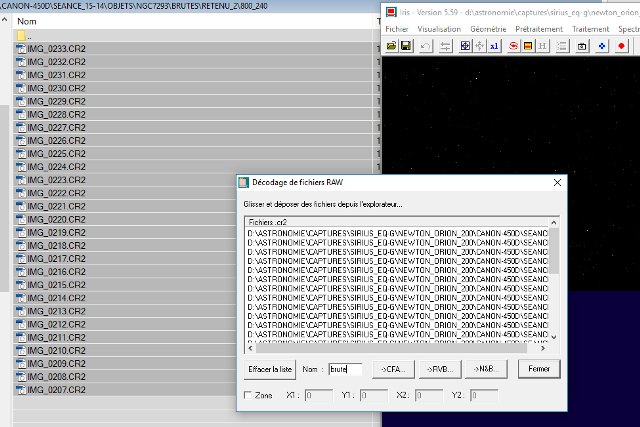
The first step before starting the image preprocessing script is to decode all the RAW images in PIC format: offsets, darks, flats, and acquisition images.
1 / Start the IRIS decoding function from the "Digital Photo" menu by selecting "Decoding RAW files": a dialog box opens.
2 / Select all RAW files to be converted from the file explorer and drag and drop in the dialog box.
3 / Type the name of the suffix for each converted images and select "CFA": all converted images are now in the working directory and are named "[suffix][Id].pic"
Here we are at the automated preprocessing stage: the IRIS scripts that I use can be downloaded here: SCRIPTS_IRIS.zip
1 / Open the control panel by clicking on the icon just at the left of the "Camera" icon
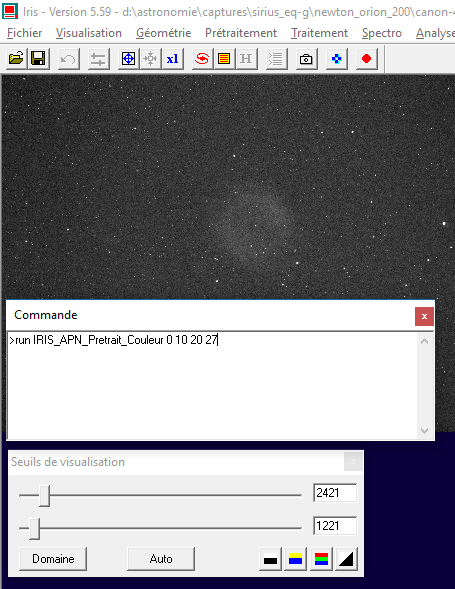
2 / For color images, just launch the corresponding script in the control panel with the following arguments:
"run IRIS_APN_Pretrait_Couleur [# offset] [# darks] [# flats] [# raw]"
Note 1: The step for generating the master offset was deliberately commented in the script because it is rarely done until we have an offsets library.
Note 2: If you do not have flat images, you can use the script "IRIS_APN_Pretrait_Flat_simule" that create a neutral "synthetic" flat instead of real flat field images.
Note 3: I use other IRIS script to align / merge 2 different acquisition sessions (increase the overall exposure time if the acquisitions were taken with the same framing conditions, ISO and exposure time)
Warning: since the number of characters is limited (100 characters max.) for the working directory and script paths, the script stops on error and in some cases it will be necessary to reduce the lengh of path.
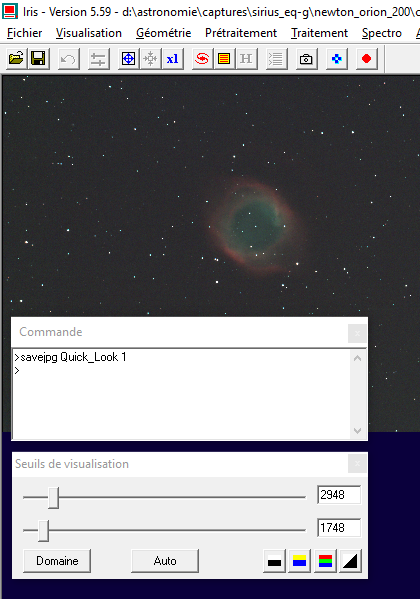
At the end of execution of the script, the only step left is to automatically adjust the levels to create a "Quick Look" image
1 / At the level of the panel "Visualization thresholds", click on "Auto": the levels are adjusted but that for the display only (not the image generated)
2 / Save the "Quick Look" image by typing in the control panel: "savejpg QL 1"
The output of the preprocessing was saved by the script: "image_couleur.psd". Just copy / move the file into the working directory of the image processing to do with Photoshop.
Results
Difference between an acquired raw image (800 iso / 240 s) and the preprocessing output (27 images retained after sorting and added together)
")
Acquired raw image (800 iso / 240 s)
")
Preprocessing output (27 images registered)
